I've finally re-textured the terrain in the borderlands/2D style i'm aiming for. I did it in the same way I did for the cave by increasing the UV tiles to repeat or what not.
I think there are still a couple of changes to make for a bit more variation - which I can probably do with a bit of rotation, but i'm still happy with the outcome.
Also been updating other areas like the record player and the box - i've finally added a texture to the record disc itself - I decided to use the actually artwork for the song i'm using called Hope by Old Lumps. The artwork style itself fit perfectly so I thought it would be a shame to not use it.
I still need to make a few other tweaks to the Space Pod, Shoulder Pads and finally texture the flag - but I should have that all done by today and will finally piece together my dance in Motion Builders story mode.
____________
In other art/animation type related newsssss....I've been keeping up with my daily sculpting progress - this is my 3rd head, aiming to sculpt Peter Dinkage and will finally try my first attempt at sculpting hair.
I'm definitely getting quicker a the initial set up and blocking out the features. After this one i'm going to attempt a full body sculpt.
In between doughnut eating and lending my life to Motion Builder i've been working on the other projects i'm helping with! So i've been living in TV Paint painting frames for Yannis's Hell Well. It's also given me a chance to flex my TV paint skills / knowledge.
Photoshop is definitely more user friendly lol but it's pretty easy to use, and i'm getting through the shots quite quickly - about 1 every 2 hours, and i'm aiming to produce a shot per day (i've done 2 so far).
Also the new animatic for Ritchie's project! As it's mainly live action there's only a few shots to animate which is good to know :) and i'll still be helping with that.
I'll also be helping Ritchie with the script - which is something i'm new to (script writing that is), but i'll use my humour and strong wit to help Ritchie's story cruise to victory!!
_______
In Motion Builder related news i've finally managed to get my Motions mapped onto my character!! Missing the eyes etc - they will need to be re-contrained to the head joint once I bring my model back into Maya!
Now beginning the exciting task of putting the sequences together to form my full 30 second dance. HUZZAH INDEED.
24 hours in the life of a Motion Capture Newbie...
This weekend I was determined to crack the secrets of Motion Capture in Motion Builder....and 24 hours (with only 3 hours sleep) later.... i've done something?
SO where to start...
The T Pose
Chris said this would be the trickiest bit, making sure everything was line, all the points were correctly labelled etc, and after an hour I finally named to 'bind' a semi successful T-Pose with my data and the MB actor. As expected (but was really hoping not to have) there were a couple of issues, mainly the head spinning and the torso jerking rudely. I was also seeing a few 'stray' data cube point things
Rude Head
Stray data cube thing hiding in the Optical sphere thing
What then ensued was a glorious 4 hours of cookie eating and feverishly attempting to find how to fix these things, including re-reading the data, recreating the T-Pose (many a time) and All to no avail!
And in typical me using new software fashion and learning everything after hours of getting it wrong it clicked that the head was only jerking like that cause the data points were suddenly moving to completely different positions (Front Head had switched to the back etc) which I hadn't been able to spot (all the cubes look the bloody same). I knew MB had its ow equivalent of a Graph Editor like Maya and and it pretty much works exactly the same and I was able to tweak the affected translate joints to FINALLY get the head and torso to stay in place.
HUZZAH.
HELLO T-POSERRR
Creating the Market Set ready to import onto new Actors for my dance data
This then lead me to the 'stray cube', after realising that these cubes names were pretty important... oops... I took the time to investigate said stray cubie and deduce that it had strayed away from its origin point of the ankle which I was able to correct with the Rigid Bodies feature.
Rigid Bodies
My lord I love this feature... if you have data points that become unreadable or start to stray a bi too much during your sequence, you can create a rigid body between data points which then creates a kinda of central point for the points all stay around... not good at explaining things, but it kind of acts as a triangluation for the other points. e.g. You can create a rigid body for the torso, to make sure the sternum, clavicle, C7 and right back points stay as part of the upper torso.
In this feverish search to figure out more about this (Chris has run through it briefly in our meet-up) I also finally found some really useful tutorials that do actually address what i've been looking for as a beginner... it's funny how you always find these things when you're looking for a different piece of information smh.
It has been VERY flipping useful!! I've been having quite a bit of pooping in the torso points and the T10 in the lower back.
RIGID BODIES AND THINGS
Naming Conventions
After many an hour of Dawson's Creek (and proud) a dark cloud of data error began to loom.
SO after my T-Pose I started attempting to import the T-Pose marker set over to new actors and aligning these with the dance data... and thats when new problems started. They were over okish, but then the arms were getting all twisted up funny, and I realised that some of the data names were incorrect... the whole upper half of the body had switched sides (right side data was marked as left) and I had to spend some time figuring out how to clean these up as this would impact all my dance stuff.
But once I sorted that all out normal business resumed! Bloody hell I learn a lot from all these problems.
Not gonna lie, i'm a massive fan of this process, data is fun. ack.
Although, in figuring this out I still couldn't work out why the arms were twisting wrong - I was more than ready to fix this all in Maya, but theennn Chris suggested that I double check that the points for Wrist A and B were in the right place.... and obviously they were now. HA. Arms are now fixed!
Character Transfer
All dance FBX files have been set up (12 in total) and i've been doing a little bit of clean up - and re-setting up rigid bodies and checking for errors. The rest will probably be tweaked towards the end in MB or in Maya, as my main issues based on the actor, appear to be the mesh penetrating itself and a bit of elbow popping.
I'm now at this glorious stage and it has been less kinda. I've had to rename the joints of my model as per MB's naming conventions so the character control can line up...
Naming convention example
I've been semi successful, but when it comes to them transferring the actions to that of the relevant actor the rig is moving but my model isn't. Woe is me...
I'll crack it. If not tonight then i'm meeting up with Chris again this week for the last bit of our tutorial to then get my files back into Maya for extra crazy times...
________________________________________
In other art life related new...
I have become semi- Tumblr famous over night....
A quick Orange is the New Black bedtime sketch has landed me nearly 9000 reblogs on Tumblr (6000 when i first saw it) AND featured as one of Tumblrs top photos...
Now... whilst i'm no stranger to these types of numbers for the bands I worked with for my last job, this is DEFINITELY new for anything i've done artwise... O_O
Lighting has been kicking my arse, mainly because it hasn't really clicked yet like with everything else. i've watched lots of tutorials, and while I understand the basics, i've yet to make it 'fun' yet in my mind.
I've been doing lots of little tests to try and get the right settings and placements and i've decided to use coloured lights get help get the spacey atmosphere i'm aiming for
Quick test - floor texture is temporary
I've also gone back to looking at reference footage, especially because I don't want to throw lights in willy nilly (yep I said it).
AND SO, even with the tutorials and the referencing and the red velvet cake I was still getting this super weird blocky output that was mocking me :(
AND SO because the internet wouldn't help me it was Sean to the rescue and in the space of an hour he's managed to make lighting seem so much less dark and and a lot easier to atleast add some lighting basics.
Firstly using the Depth Map Shadows appears to be screwing me over, I didn't really need to be using it, I can get much better results by using Ray Trace Shadows and tweaking these settings to get the effect I wanna use.
I also want to get the screens inside the ship to glow inside Maya instead of when compositing so that they can light my model.
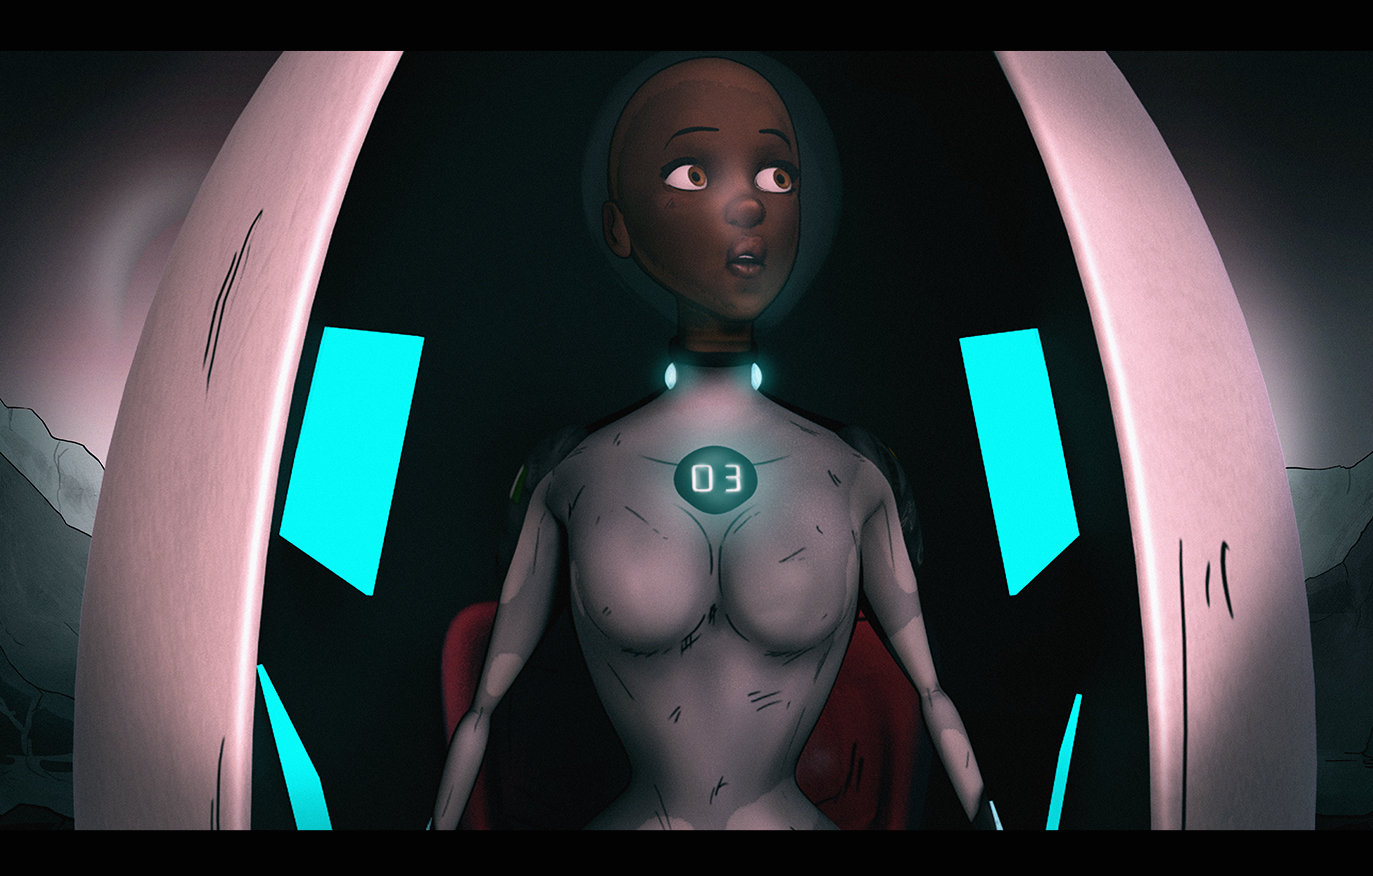
One issue I did have was what appeared to be a weird patch of light on the face (mainly affecting the cheeks and upper lip)
I thought it might be the lights or texture and after 2 hours of testing I finally figured out that it was the simple option - the bloody outline -_-.
The reversed normal mesh must have been doing something weird... penetrating the mesh in some way, so i've been able to fix it and other problem shots by simply turning it off ha. I'll be rendering it off as a separate layer and the lighting doesn't need to affect it so i'm not worried.
FIXED
I also picked up a neat trick from Sean - I can 'turn off' the lights affecting bits of mesh in the Relationship Editor. I've done this with Shot 9 as I need her to be more illuminated but not the cave - so I have 2 directional lights set up.
AND SO, after 12 glorious hours, I HAVE FINISHED LIGHTING!! Again this will all be revised just before rendering, and i'll get a second opinion from someone else to make sure I haven't gone crazy.
But as of now all that remains ahead of my July 1st Render deadline (10 days ack) is Dance sequence and Texture tweaks - which will be occurring on Tuesday.
But i've also decided that even if I haven't finished the dance rendering will still be happening especially because i'll probably need to do a couple of tests.
Sad times.
Never has a song been more relevant. Thank you Hoobastank
Huzzah! I finally managed to get into Ninewells on Tuesday for some Motion Capture with Cristina :)
Since I have NO idea about any of this, Graham was very very helpful, and I think I was quite quick to pick up what was going on and why etc.
In terms of the dance itself, Cristina took elements from the choreography I was about to use from the dancer, and added a few of her own freestyle moves and I think they all came out really really well! (from what I could see).
A few photos from the day
This definitely made me more intrigued to learn a lot more about MoCap, and I was really keen to start collating my data and get it added to my model so I can do lot of clean up and extremes
So there I was with Motion Builder realising that I had NO IDEA OF WHAT TO DO NEXT and what to do with any of the data etc. I spent a really really long time scouring the net for where to start, and I honestly could not find anything that helped me as a beginner - even Digital Tutors is lacking in the initial key set up.
It's disappointing that there isn't more out there... (maybe I just wasn't looking properly) and that pretty much left me at a cross roads - I could either go back to my original plan of key-framing - which I know and am comfortable with. Or I could spend 2 weeks trying to figure out what i'm doing and be at risk of getting it all wrong...
There's definitely heaps more to it than I initially realised and it's more complex. But LUCKILY, Chris specialises in Motion Capture, so I asked if he could point me in the right direction, but he's gone one step further and offered to help me and give me a crash course in Motion Builder so I can get set up and learn how to transfer the motions over to my model.
We met up today and it was DEFINITELY really helpful, he showed me some great examples of what he's done with his own project which helped me really visualise the complexity of it all. I'm still really surprised that I couldn't find any introductory tutorials. He's lead me up to a point where I can turn the points to characters and get these mapped to an actor and my model. After i've done this with all my files we're gonna sit down again and he's gonna walk we through transferring this all back to Maya, and putting together movement sequences.
It's actually all really exciting (cause i'm a nerd like that), and I feel like this already has the same feeling as rigging does, and I think that my knowledge of rigging has helped my understanding of it all, especially in terms of terminologies etc.
Fun times to be had! Aiming to have this first part finished by Sunday!
In other project related news, I feel like everything is really beginning to take shape and come into place visually.
I did another quick playblast with my intial lighting attempt where the shadows betray me...
My scenes are all dressed now with a new terrain / cave tweaks, and the camera's are all set. So all that's left before rendering:
Tweak Textures
Set Lights (urggghh)
Dance sequence!
12 days left to do these - let the no sleeping commence!
Well first things first - it's almost time to start work on the other project's i'm helping with, and now that i'm so far ahead with my own this is definitely the best time to start!
I'm going to be helping with animation for Ritchie's project - Let's Find Them Together. And I had the exciting pleasure of rig testing Clint the pigeon!!. I'm a massive fan of Annita's rigs and everything she's learnt this year and once my projects over I want to get back to rigging practice and learning coding!
It's a bloody good rig, and it's useful to get to know how to use it, and it's limit's ahead of animation, it's also a great excuse to play with some PG poses....
Happy Clint
Karate Clint
Innocent Clint
Sexy Clint
Smug Clint
I love Clint.
________________________________________
In work related news, with all my cameras set up ad life spiralling, i've decided to remodel my cave - the idea of just have a matte for a wall didn't appease me AND when it comes to lighting, actually having a cave type thing for a lot of the shots will be VERY useful for casting fun shadows.
After months of cave /soul searching, I accidentally stumbled upon some really useful videos for quickly modelling and texturing them - to be honest i'm gutted that I didn't suss this out before. For shame.
Soooo firstly, this is was a complete test to see if I could get it to work and what I would need to change. The UV map being the main thing...
I've kinda cheated it and created a 'UV from Camera' - which will definitely save me time from UV mapping the whole thing - parts that won't even be in shot.
I've completely repainted the cave wall based on some Borderland references... there are still a few colour tweaks to make and I need to work out the tiling, which isn't currently going to plan... but i'll crack it...
SO In keeping with my mini schedule, i've been tweaking my animations, keeping in mind Sean's feedback. I've also been resetting up my camera's too get better and slightly more 'exciting' angles so the whole thing isn't just a series of mid shots.
I wanted to add a little camera shake for when the pod hits the ground - I already knew how I might approach this, but staring at this day after day has definitely made me less than objective (on weekends atleast), so Youtube was a wise consultation - especially as I wanted to get that 'heavy' effect.
SIMPLE YET EFFECTIVE!
Here's the camera shake action for Shot 4/5, and also a camera position tweak on the X-axis to get more of a bearing down angle to make her look a tad smaller and intimidated.
I could still exaggerate it a bit more but i'm happy with this angle at the moment and I wanted it to include most of the torso - especially as their a close up head shot that comes a few seconds after.
Also been working with the silhouette to redo Shot 13. The main aim was to get better follow through - and it was much quicker to just redo instead of attempting to try and tweak the keys.
I think that once the dance sequence is completed i'll revisit these Shots one las time for final FINAL tweaks (as i'm sure I would have learnt a few more things by the end of it).
NEXT ON THE LIST! BACKGROUND! I've definitely come a long way with these especially after the first draft. I've been tweaking the lines and tones so they don't blend too much with my character. But I also wanted to take some colour psychology into consideration to help create different atmospheres to represent her mood change from the start to the end.
So that's red/green at the beginning for a creepier / unknown vibe, then orange/pink/bue by the end for a much calmer happier tone.
I've got 7 different variations for different shots and once I tweak the textures i'll do a final pass at these for any extra colour corrections - although I could just do these when compositing.
______________________________________
In non-related final project news art related news... I am still ZBrushing a new bust and deciding on my next venture, i've also finished the Harrys HuHa2 videos and want to start work on an animation practice in TV paint before I flesh out the idea for my credits.
Oh and I also decided to pay homage to the show that got me into all this art malarky... good old Dragonball Z.
I've definitely picked up lots of really really useful Photoshop tips since i've been here, which has definitely helped me be more confident with attempting to paint something like this (even though it is just fanart...)
WEDNESDAY = Lighting Day = UNSUCCESSFUL! I majorly need to give myself that lighting crash course to figure out what i'm doing (and why O_O) so i'll be attempting to conquer that on Monday.
I want to work off and develop the things I managed to pick up during going live - so i'm aiming to use an IBL and Direct lighting, unless I find a reason not to :)
I've been looking for videos / examples of lunar lighting, an haven't really come up with what I hoped i'd find, so I may need to be a bit more clever. ALTHOUGH I have managed to nab myself a nice lunar IBL from the good people at HDR Labs
Been attempting to put it to the test and figure out what's going on with life. According to Maya, there isn't much D=
p.s These are all without the aid of direct lighting. I also threw in one of my backgrounds for good measure to see how it might fit.
Main lesson here - actually figure out WHERE my light source is coming from.