31 March 2015

Week 29: Tests, Targets, and Telling myself I should get some food

So, this week I want to kick my self back into gear with various projects (i've decided that this is the week to do that just because).

I'm aiming to do a number of things,
1.Test my rig
2. Start building my scene
3. Animation tests.

I can't remember if I mentioned this already, but whilst i'm home for a week early May I want to carry on animating without killing my laptop, so I aim to animate my character in a blank scene and import her animations via Atom to the main one.

I want to test a walk cycle with her this week too help establish her character - I want to try some clever things with it to really 'convery her emotions' and all that, so I need to be clear with out I do it and spend some time on it. I might also use this as an excuse to test out some 2D things - so I might draw out her walk cycle as opposed to taking photo references.

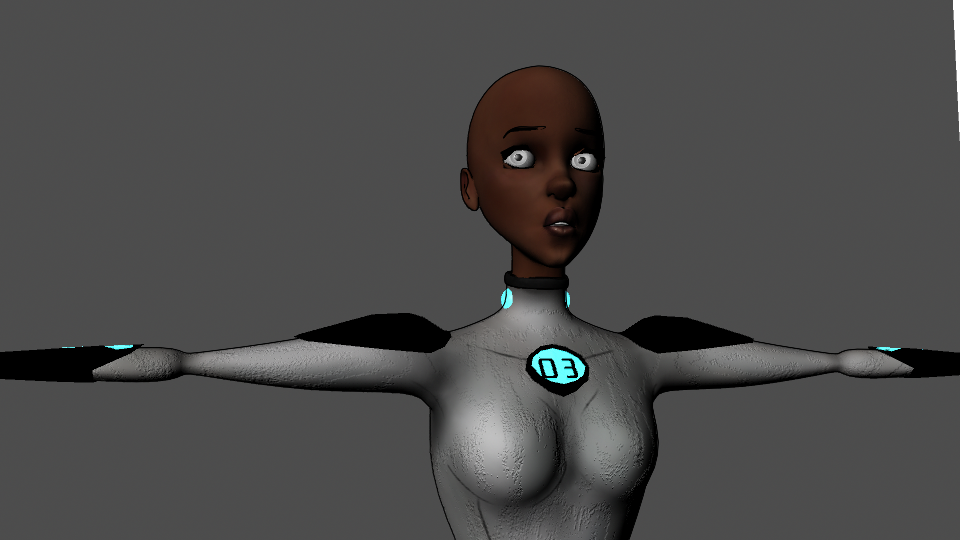
Lots of I wants/I aim's no doubt i'll learn some sort of lesson from this, just hoping I don't find anything too wrong! So far the rig is holding up well, and my weighting hasn't been too bad, some areas to watch I think though.

ALSO released that I don't think I bound the foot bone... awkward. But tbh, the controls seem to get it to move fine, and as long as it's not causing too many issues - which it doesn't appear to be - i'm just gonna leave it :)


So far from my testing I have deduced that IK is more awesome than FK. I <3 IK.

UPDATE.
I've been doing the testing, and the issues I thought i'd find with the rig/weighting appear to be non existent! I definitely did more with this rig than was needed, but at least I have the option if I want it, and what I learnt about Maya was a bonus.


I've been having fun with blocking out a few basic shapes, and i'm going to start living on Digital Tutors to pick up any extra tips! I've already had a few from Amit and Sushma which has been very handy - also had a render crash course courtesy of Amit for our Going Live project which will definitely help for this.

In regards to the testing, I noticed a couple of small deformations to the texture with certain movements with the leg. Not sure if this is rectifiable, but if not I want to kind of 'cheat' it and just avoid capturing those areas on the camera!


26 March 2015

Assets, Alternative Activities and an episode of Arrow

Due to comic, sleep and essay related activities, my plans for testing and blocking have been scuppered for the week. However all was not lost...

I've been thinking about some of the extra assets needed for my production - like rocks and the leaf at the end etc. I realised that some of those assets might already be available to me - so I asked my Going Live team if it would be ok for me to use the rocks and leaf modelled by Natasha and Yannis ^_^. All I need to do is re-texture.

Sushma also gave me some tips when it comes to modelling my surface plane - i'll need to make sure its not to bumpy etc or her feet will look like its going through! So she suggested that I plan a route for her that can remain relatively flat, and then do some nice bump mapping. She has also very very kindly offered to help on some of animated scenes, to which I am EXTREMELY grateful :D

To celebrate I posed my character in a pod and gave her a shocked expression to represent my shock at how quickly this week has passed.


UPDATE
A quick spot of character design before bed. Still playing with this new brush and trying new things!

This is Bobbi... an addition to the project I was babbling on about a couple of weeks ago. She likes Kanye West, NERD and dodgey TV shows.


25 March 2015

Week 28: That time when I didnt sleep (again)

The things I do for comics.

Currently on the tail end of a 30hour being awake session, and I owe this latest sleep deprivation to Dee-Con (and mainly my procrastination). I have FINALLY (dialogue not included... oops) finished my first finished comic haaa to hand in today for print ^_^.

I started it weeks ago but casually decided to a avoid colouring (which seems to be a running trend), but after realising I had 4 days to finish it I got some wise tips from Yannis and set on my journey to comic mayhem.

I decided to re-ink all 11 pages with the new brushes I aqcuired because I really wasn't happy with the previous brush and inconsistencies. Super happy with this one and managed to get it done over 2 nights. THe last 2 nights I have been colouring and eating large bowls of food and rewatching Kimmy Schmidt in order to stay awake. Success!

I think im a little too tired to assess how I feel about the outcome of it right now ha, looking at it again this morning I saw lots of still mistakes I made when I was half asleep so I wonder if i'll see more when i've finally slept lol.

But here's one of the pages i'm really happy with.. this also happens to be the first page, when I was at my most awake.


21 March 2015

Automated, Avoidance, A Few Tweaks

In a slight effort to 'avoid' making some final tweaks to my research essay I decided to make some light tweaks to my rigged model.

I few weeks ago I saw that Anita had added an automatic fist clench attribute/control curve to her groups Going Live models, and after working on animation this week, i've decided that it is a VERY useful thing to have, so I endeavoured make one.

Tbh I thought it would be a bit more complicated (and I can see how it can be), i'm sure there's a script out there for it, but I got away with just using my favourite Maya tool - Set Drive Keys.

It's given me a good result.


Her fingers a re bit odd aka really thin anyways so this won't be the tightest of fists, but I think it was more than enough to give me what I needed.

I added the attribute on the IK handle - which i'll probably use the most when i'm animating her. Although i'd still like to find out if there's any harm in adding it to the FK handle...

20 March 2015

A discovery...

I'm taking this elf indulged 2am moment to announce that I have FINALLY found the PERFECT inking brush courtesy of Brollonks.

I am VERY happy about this, as it was really REALLY bothering me having the brush 'bleed' in Photoshop - I was gonna move over to Manga Studio - which I still will dabble with - but Photoshop and I are the best of friends.

I commemorated the moment with a WIP of Gamora for DeeCon


Annnndd The Stalk from Saga


I Is Animator

In my quest to become an animator, I have learned that I actually need to learn to animate.

Lucky for me Going Live has left me no choice (to which I am happy for), so i've had a chance to do more than a walk cycle and brush up on my animation skills before I start blocking out my final project.

In usual Bimpe fashion I ran before I could walk and pretty much tried to skip ahead with key framing everything - mainly because I misjudged the 'complexities' and nuances of the scene.

Luckily for me this ended badly, forcing me to once again remember that what seems like the long way round (blocking biggest movements) ends up being the quick way round especially if it means you don't need to start again because you screwed up a scene.

ALSO despite being mean most times, Maya is smarter than she (yes she) looks and creates her own inbetweens - leaving it up to me to address / key the more detailed movements / parts.

Meaning I get better results like the below:


I've had a lot of really really helpful advance from Sushma on these - and I know they're not perfect, i'm definitely feeling a lot more confident in doing it. The main thing will now be understanding and utilising the key principles and again paying more attention to anatomy and movements. 
I'm finding it heaps more useful to use myself as a reference to act out the moments instead of just using photos... although that's mainly for actions as opposed to walk/run cycles.
My key lesson(s) for this is to take my time, be VERY patient and FOLLOW THROUGH.
Anatomy funtimes shall ensue.

19 March 2015

Assets, Accents and A New Kendrick Lamar Album

I've been beavering away to finish my textures this week, and I think i'll have them all completed by the weekend so i'll be ready to start blocking animation!

Working on the going live animation shots has definitely prepped me in feeling a bit more confident about doing it! And Sushma's been giving me some really useful tips. I just need to take my time and aim for completing a certain about of seconds a week.

The new target is to have animation blocked by the end of the month and despite the slowness of my texturing I can still be on target to finish all animation by the end of may :)

I want to spend the start of next week doing a proper rig test and some animation tests then make any tweaks that are needed.

I've almost finished up the asset textures - I want to redo the space pod - i'm having trouble doing it in Mudbox for some reason so I need to find a work around and a way to avoid the seams showing.

The screens won't stay that bright - i'll add the glow in post. There's also heap of wiggle room with the texture colours, especially now i've pretty much got them done (lines and all).

Also finally got round to adding 'stickers' to my characters shoulder pads - I had a bit of a brain fart with these so again there's room for me to change these and what I want to put on (and I probably will when i'm feeling less in a rush to finish texturing).


These logos are all pretty bias and personal to me so there's music/comic references in there among other stuff. I'd initially envisioned covering the whole thing, but as I said, brain fart. There's time me thinks.

Fun times, more Kendrick.


16 March 2015

Week 27: The AniJam

48 hours and just over 5hrs worth of sleep later and we have successfully completed The AniJam event courtesy of Smudge Digital.

This was a stupidly good weekend, and I feel to lucky to have been able to work with such hilarious and ridiculously talented people. 


The vibe was so chilled and everyone put in more than 100%! Nearly all of us are working together on the Going Live project which definitely helped - so we know each others strengths etc.

Knowing that we only had 48hrs to do this we knew it needed to be simple and that we would be doing everything from scratch. The only decision made before hand was that it would be a 2D / 3D hybrid of sorts as most of the team has lots of 2D experience.


The brainstorming session took a little while, but once we found our idea (a hybrid between Slava and Amit) we ran with it and I was amazing that we were all really in sync when it came to visualising it - the storyboard was really rough and quick but we managed to go in the same direction.

Ritchie was overseeing the overall style and look - everyone has such individual 2D styles and we knew this would need to be reigned it, and as Ritchie came up with the character design we really wanted him to reign us in so our designs weren't straying to far.

This is Clyde!!!
Our weapon of choice - Flash.

Ritchie threw together a quick and really great tutorial to ensure we were all making the same kinds of line! I think we really managed to get away with it and that it all blends quite well :)


I haven't used it properly in so so long, and this was my first proper animation sequence with it - was VERY VERY grateful for the advice from Natasha and Yannis, and the hilarious reference from Amit.


I was also production manager for the film and worked on some quick 3D modelling and texturing as well as an array of things including animtion! It was really nice to finally get to do some proper compositing! Still lots to learn but was great for the chance.

This was such a great experience (despite the lack of sleep) and definitely lots to take from it for our Going Live project!! It's also made me really want to focus on a 2D animation stint after this course has finished and see what I can do!

We're all really REALLY happy with the final output and just so happy we finished it! Its a shame that we couldn't get all the sounds added but we're gonna add these in this week so we have a properly completed piece for our portfolio.


So here is Clyde in all his glory


11 March 2015

When I can't sleep...

I tend to draw for ages, which tends to keep me up even longer... but I had another idea for a potential story courtesy of lots of Queens of the Stone Age and Nirvana. I have a playlist as proof


It's definitely one for the development pile (like a few other things =/ ) but quite keen to crack on with this one whatever it turns out to be. Will also be a good test for Manga Studios...

Sleep is needed


10 March 2015

Borderlands, Bumps and Beautiful Mudbox

Working my way through my body texturing - trying a slightly different approach to this one. I found a GREAT tutorial (finally) on replicating the 2D Borderland style texture. I don't want to fully copy it but there are elements that I'd really like to play around with!
Mucked around with projecting a catsuit stencil to my body model and have been adding in some extra details like lines and different tones. 
I'm kind of happy at the moment but I really need to tweak the bump which is a bit to heavy at the moment - even on a 9% transparency - again I used the same bump stamp I created to use on the face - but i'll probably re-evaluate this.
I did a couple of quick render tests - just block colouring the other body assets like the shoulderpads etc to get a more rounded view of where i'm out and how she's turning out.
Mental Ray render with sun and sky indirect lighting

Mental Ray render - TO MUCH BUMP!

Maya render to see Toon shader
Really really happy with how the textures are turning out!! But things I now need to do / consider
  1. If i'm going down the whole borderlands lines route then I really need to go for it - they need to be clearer and bolder, otherwise they just look like smudge lines
  2. Drop that bloody bump - or remove it, will need to test
  3. Add a bit more tone variation on the body
  4. Maybe add a slight Specular map to the face and body 
UPDATE
Completely dropped the body bump to about 3% which is heaps better. Also added a slight spec map to the face - need to add to the body. Also refined the lines on the body. Maya's sun lighting makes it a bit less clear but I know I can change this. But happy with it so far


9 March 2015

Week 26: Tainted by Texturing

Dammit, yeh I think i've finally got the texturing bug.

It's definitely clicked and i'm already thinking about what I want to sculpt and textire in Z-Brush. I've finally been able to apply my Photoshop skills to it, and i've been making a couple of stamps of my usual PS brushes to add a slightly rougher texture to my model.


I've tested out adding a bump to the lips to get the creases, but also a few pencil lines - i've done the same for the ears to, and i'm considering adding a few sketchy lines to the face, but next step is to apply it to my model and see how she looks! Will also check the lighting and do a bit of gamma correcting. I might still run the texture through PS but we'll see.


Diffuse ahoy


Thank you Rasputina for fighting away all my texturing fears

Rasputina - Howard Hughes


In other news, we're still trying to figure out if we'll have enough time to get an anthology thrown together for Dee-Con, but if not i've got some portraits what i'll probably want to sell. Also want to work on a few new ones - i'm thinking Game of Thrones and Marvel (fan-fodder).

UPDATE:
Quick test render using Maya software with unedited toonline and with direct lighting via Mental Ray.


Ahhh the smell of progress. I'm actually quite happy with it! Gonna get some feedback, make final tweaks and hopefully have the body and assets FINALLY done this week ^_^. Ahhh also need to figure out the eyes...

8 March 2015

The Fickleness of Photoshop Love

I have no shame.

When it comes to art practices I tend to get that moment when things suddenly click and I think i've finally got that with texturing.

After a chat with Sean I realised 2 things.

  1. I can render out my tone line separately and make tweaks to it like thinner lines etc in post
  2. I love Photoshop, but i'm not sure it loves me - my initial texture sucked.
I've been so focused on just throwing something on, ignoring actually showing my texture some TLC, but also forgetting all my methods and practices as a painter (like following all the curves and patterns of the face etc) - which is why I haven't been enjoying it. I haven''t been able to convert my 2D paint processes to 3D until today. 

I FINALLY went to see Big Hero 6 in search of some extra inspiration and I think it kind of re-reminded me of what i'm really hoping to achieve this year (obviously within my limits). So i've knuckled down with my texture again and am just trying to have fun with it, and paint like a painter!

I've ditched Photoshop in favour of Mudbox (again) this time just importing the head as an OBJ - the capabilities are heaps better, there's less lag AND I don't have to worry about the seams. Although it means I can't use my Photoshop brushes i'm quite excited now to work with what i've got - the stamp etcs.

I'm now heading into my 4th week of texturing (2 weeks overdue) which isn't cool. So I really really need to reign it in now.

I think this will turn out a lot more realistic than i'd expected, but to be honest that is my painting style and I think it could work quite well!! Also still looking at some comic references - Jorge Molina's portraits of Storm in particular.


5 March 2015

Photoshop Fwend...

I love Photoshop 3D!

I'm sure its not the best platform for texturing by far, but for what i'm trying to achieve and for how I function, this has definitely been a great way for me to explore texturing.

I've been having a bit of a play around but I think i'm finally settling on something - I'm avoiding the toon shade look, but still want to use the outline for a 2D effect. I was struggling mostly with style and application but after approaching it like I would do with a digital painting I mucked around with some custom brushes to kind of emulate my current painting style.

Diffuse Map courtesy of me
I might play around with this a bit more to get in a few tones!
Also been playing around with Photoshop's automatic Normal Mapping - not entirely sure if I'll need one but i'm liking the look of it, been to see what it will look like when rendered.
Basic Normal Map courtesy of Photoshop
I had to tweak it slightly as it was really showing on the seams - and the 3D option is quite temperamental at the moment - the only way to get rid of the seams is to paint on the 3D model, which would mean I can't really paint on the UV map at the same time - the changes cancel themselves out... for shame Photoshop.

Hello...
Still making a few tweaks and changes and testing out a few things. I added a few hand drawn outlines and a slight purple gradient cause i'm funny like that.

My unlit displacement map
Still lots of learning to do and I have the glorious Slowdive to see me through it.

UPDATE:
Quick test applying it to my model - no attributes really tweaked except for the reflectivity of the phone...Still changes to make, and figure out why the eye lids aren't rendering, although I have a rough idea...
But yeh i'm pretty happy with how this is finally shaping up! Will experiment with changing the line colour
I'm comic related news i'm all done with my lines and i'm ready to start colouring. To be honest there's probably a bit of clean up that needs doing but I just want to crack on with finishing it! Also starting to think about what I want to do next :) Aim is to have a couple of short stories by the end of the year.
Also probably going to migrate over to Manga Studio again for my lines - they're so much cleaner... not a fan of the subtle shadow that Photoshop leaves behind.
Also seriously considering doing my inking on paper just to ditch the digital for a little bit.
Good times!

2 March 2015

Week 25: Manning Up and Moving on

OK, so i'm cracking on and making sure I complete tasks that i'd previously avoided, like smoothing my model D=. My main worry was the impact it would have on my laptop but so far all is well with 2 subsvisions!

This also means that the toon line works ALOT better when using Maya's renderer - this is a quick render with no tweaks to the toon line.


So far it looks like it hasnt affected my rigs or blends so i'm gonna carry on!

I'm currently experimenting with Photoshop's 3D capabilities - because really the key to this is for me to really enjoy the process to really really get the results I want, so thought i;d give it a punt - seeing as I spend all my time in it and I love it and I like to think it loves me...


I know a lot of this week is going to be a case of trial and error and just experimenting which is more than fine by me - so long as I make a final decision and hopefully have it finished before next week.

I also tend to have the habit of creating things that aren't needed but to be honest everything is a learning curve for me, so the more I do the more I work out about Maya and what i'll need to do for my project. So in the essence of this rant I made a normal map in Maya... now I know what a normal map it. I also know that I probably won't use it, but it made me look at Maya's render setting and feel less nervous about multipasses.


Nerd.

UPDATE.
I am a massive fan of this old Photoshop 3D malarky...the fact that I can see the UV's and automatic updates of what the texture will make my model look like makes me feel heaps better. AND i'm so at home in Photoshop - I have all my custom brushes that I think we will come in hand for this